Admin: Set up Turnitin Configuration
STEP 1: Access CN Channel>>Integration>>External Tools. Click on the pencil icon under the Control column for Turnitin LTI 1.1.
STEP 2: In the Add External Tools pop-up, enter the Consumer Key, Shared Secret, and Launch URL.
Note: Your institution needs a Turnitin license to receive this information and integration instructions from Turnitin.
After the configuration above, Turnitin LTI 1.1 can now be accessed from all institution courses.
Instructor: Enable Turnitin through Assignments
STEP 1: Once Turnitin LTI 1.1 is configured by CN Channel admins, instructors can enable it through assignments. In your institution course, create a GradeBook item. Select File/Multimedia as the submission type and then a checkbox will appear that says “Enable Turnitin LTI 1.1”. Check this box to use Turnitin for this assignment. Finish filling out the rest of the form.
Note: You will not be able to add a rubric in CN for assignments that have enabled Turnitin. You will have to create the rubric through Turnitin.
STEP 2: After creating the assignment, a popup will appear asking you to go to DropBox. This must be done in order to activate Turnitin on the assignment.
Note: If you are in the middle of creating a task, DropBox will open in a new window so that you won't lose any progress on your current task.
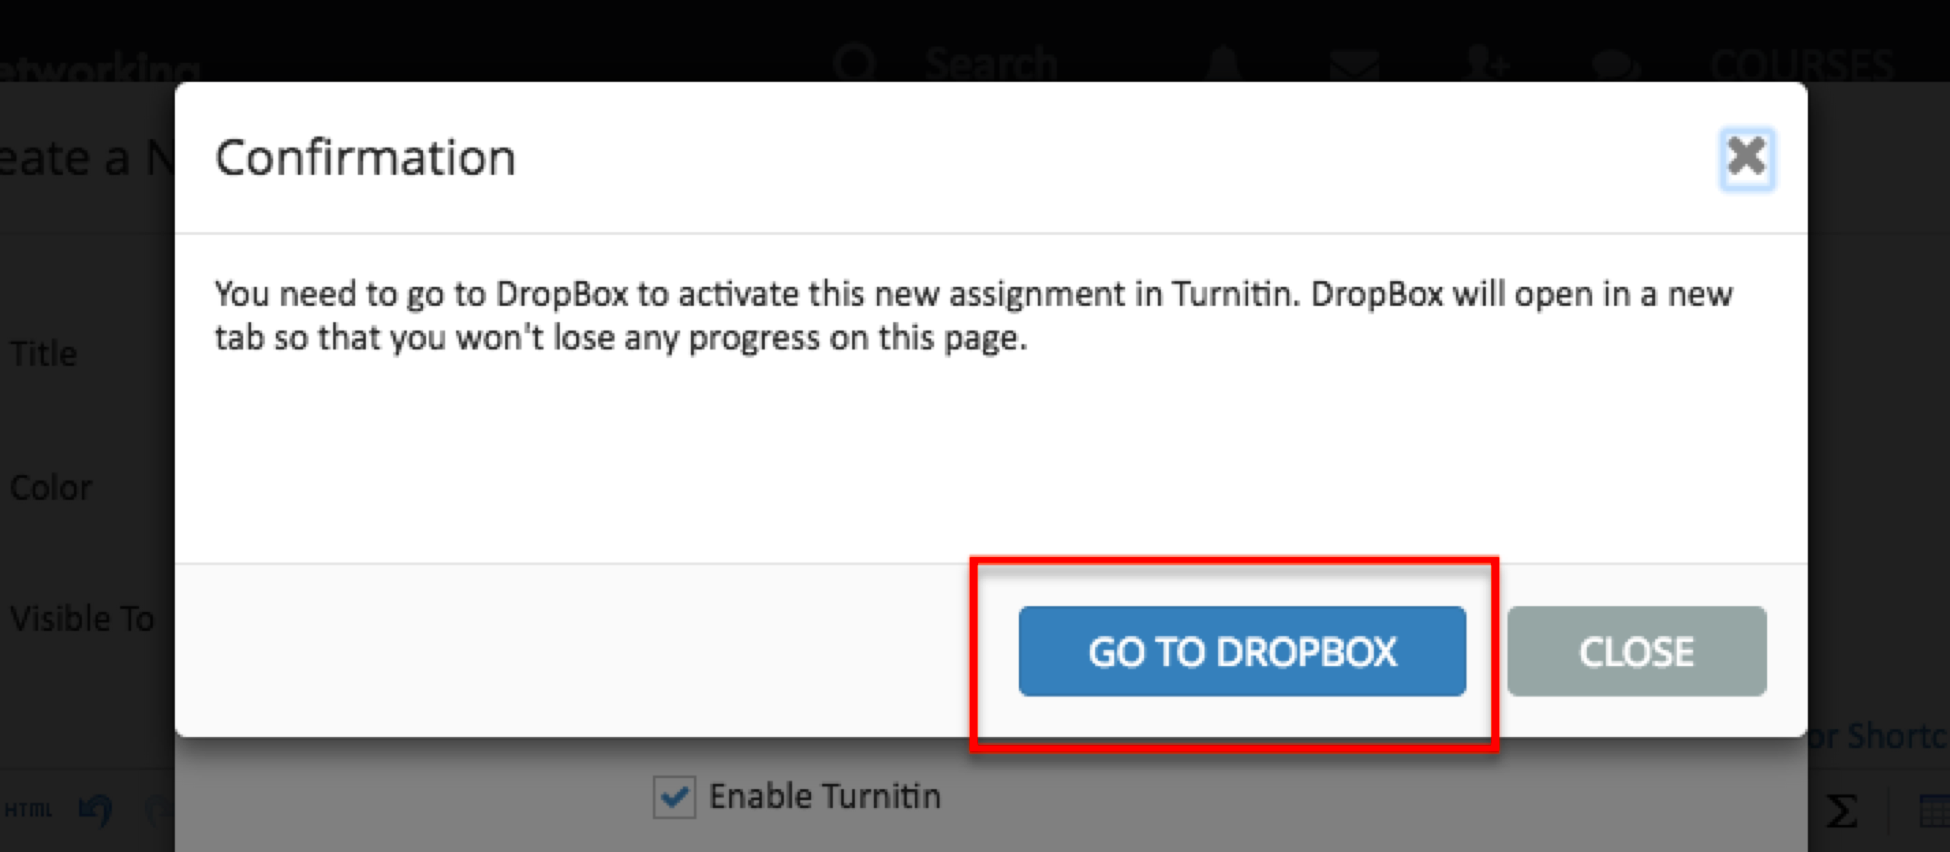
STEP 3: After clicking on the GO TO DROPBOX button, DropBox will open in a new tab with the assignment selected from the Item Name dropdown. This automatically activates Turnitin on your assignment. Students can now start making their submissions on the assignment.
Note: You can click on the "Settings" tab to view and edit more controls, such as Feedback Release Date, Allow late submissions, rubric, etc.

Student: Submit Turnitin Assignments
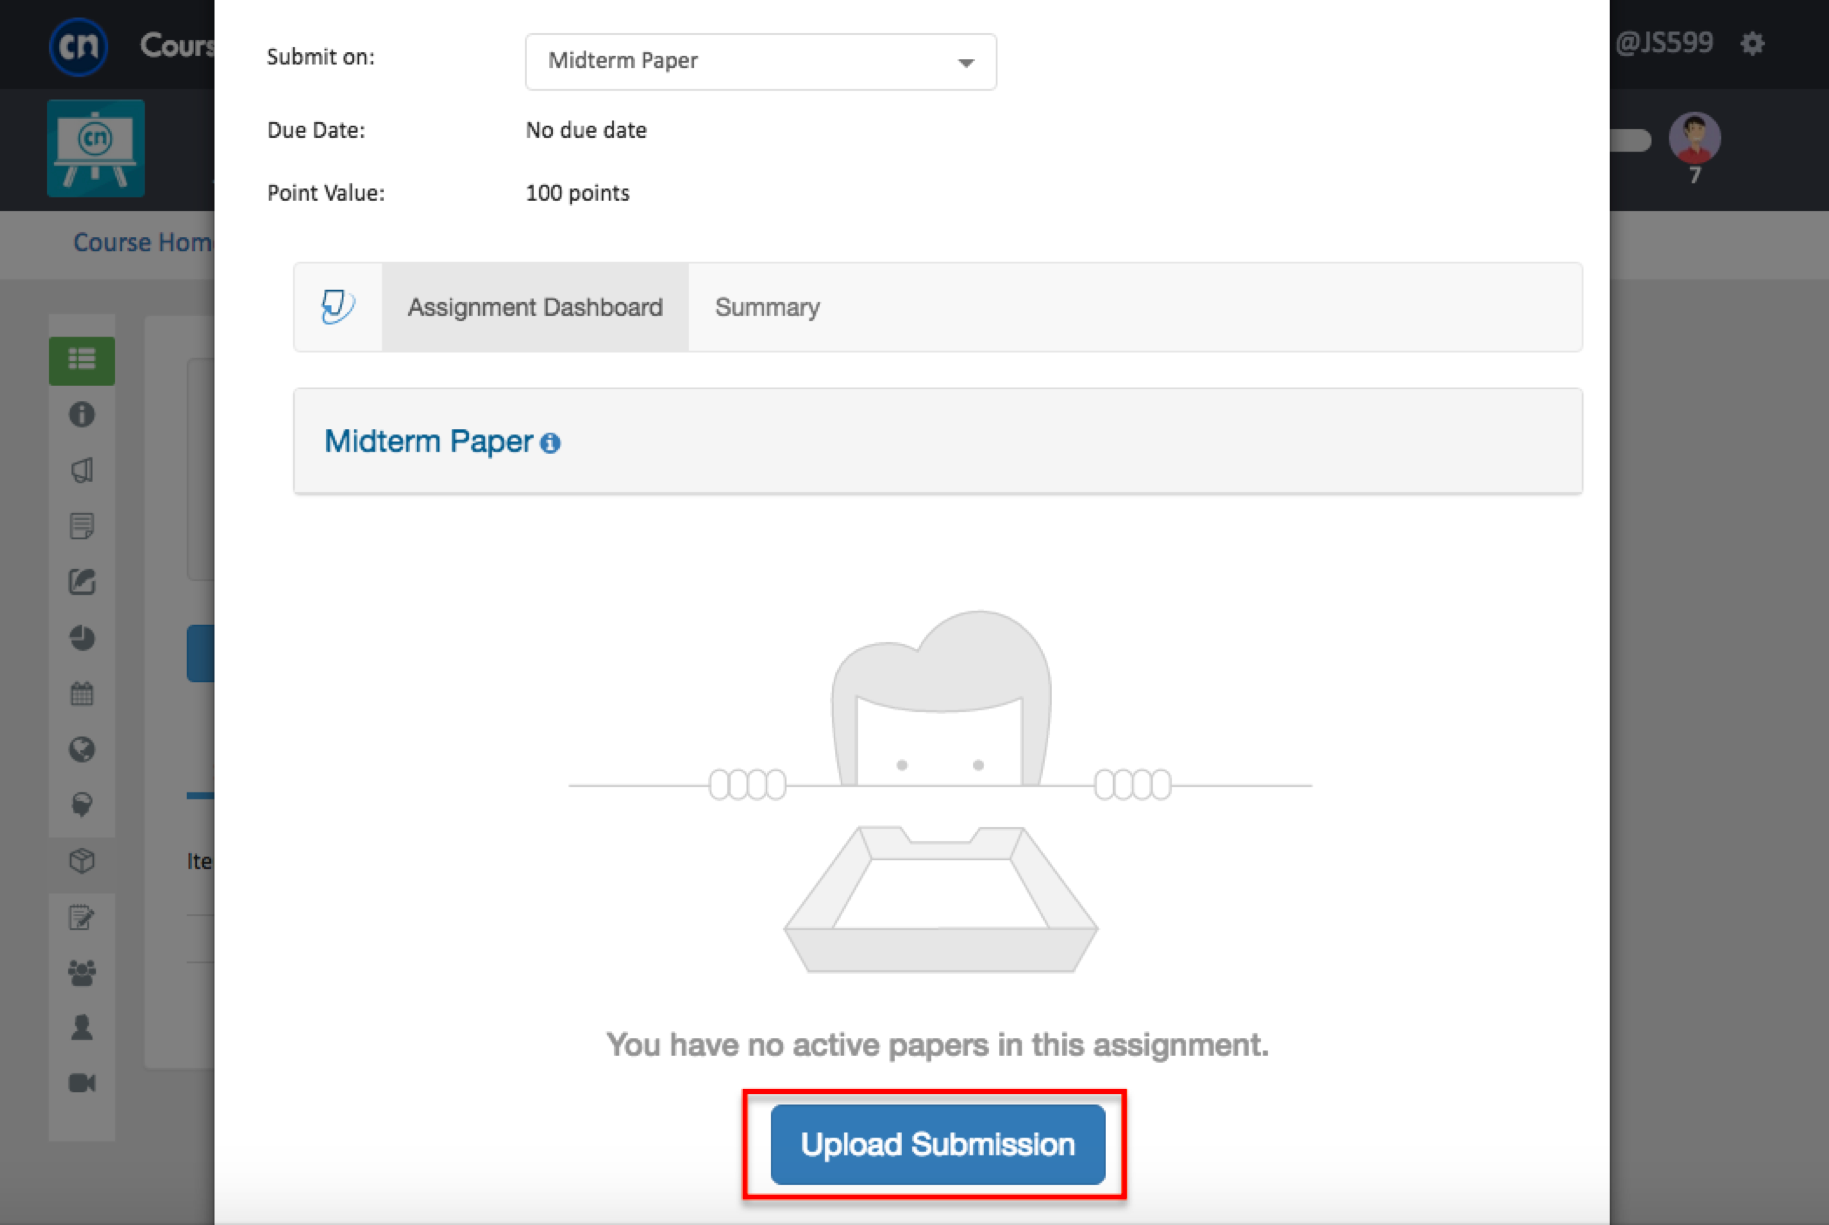
STEP 1: After students locate the assignment and choose to submit it, the Turnitin frame should appear. They click on the Upload Submission button to complete the submission.
STEP 2: They enter the Submission Title and select a file to upload. Once done, click on the Continue button.

STEP 3: After reviewing the submission, they click the Accept Submission & Save button. They have now completed the submission to Turnitin.

Instructor: GradeTurnitin Assignments
STEP 1: Once students have made their submissions on the assignment, the instructor can begin grading. Go back to the CN DropBox and select the assignment from the “Item Name” dropdown. You should now see a list of submissions that have been made on the assignment. Click on the name of a submission or on the pencil icon in the Grade column to begin grading a submission.
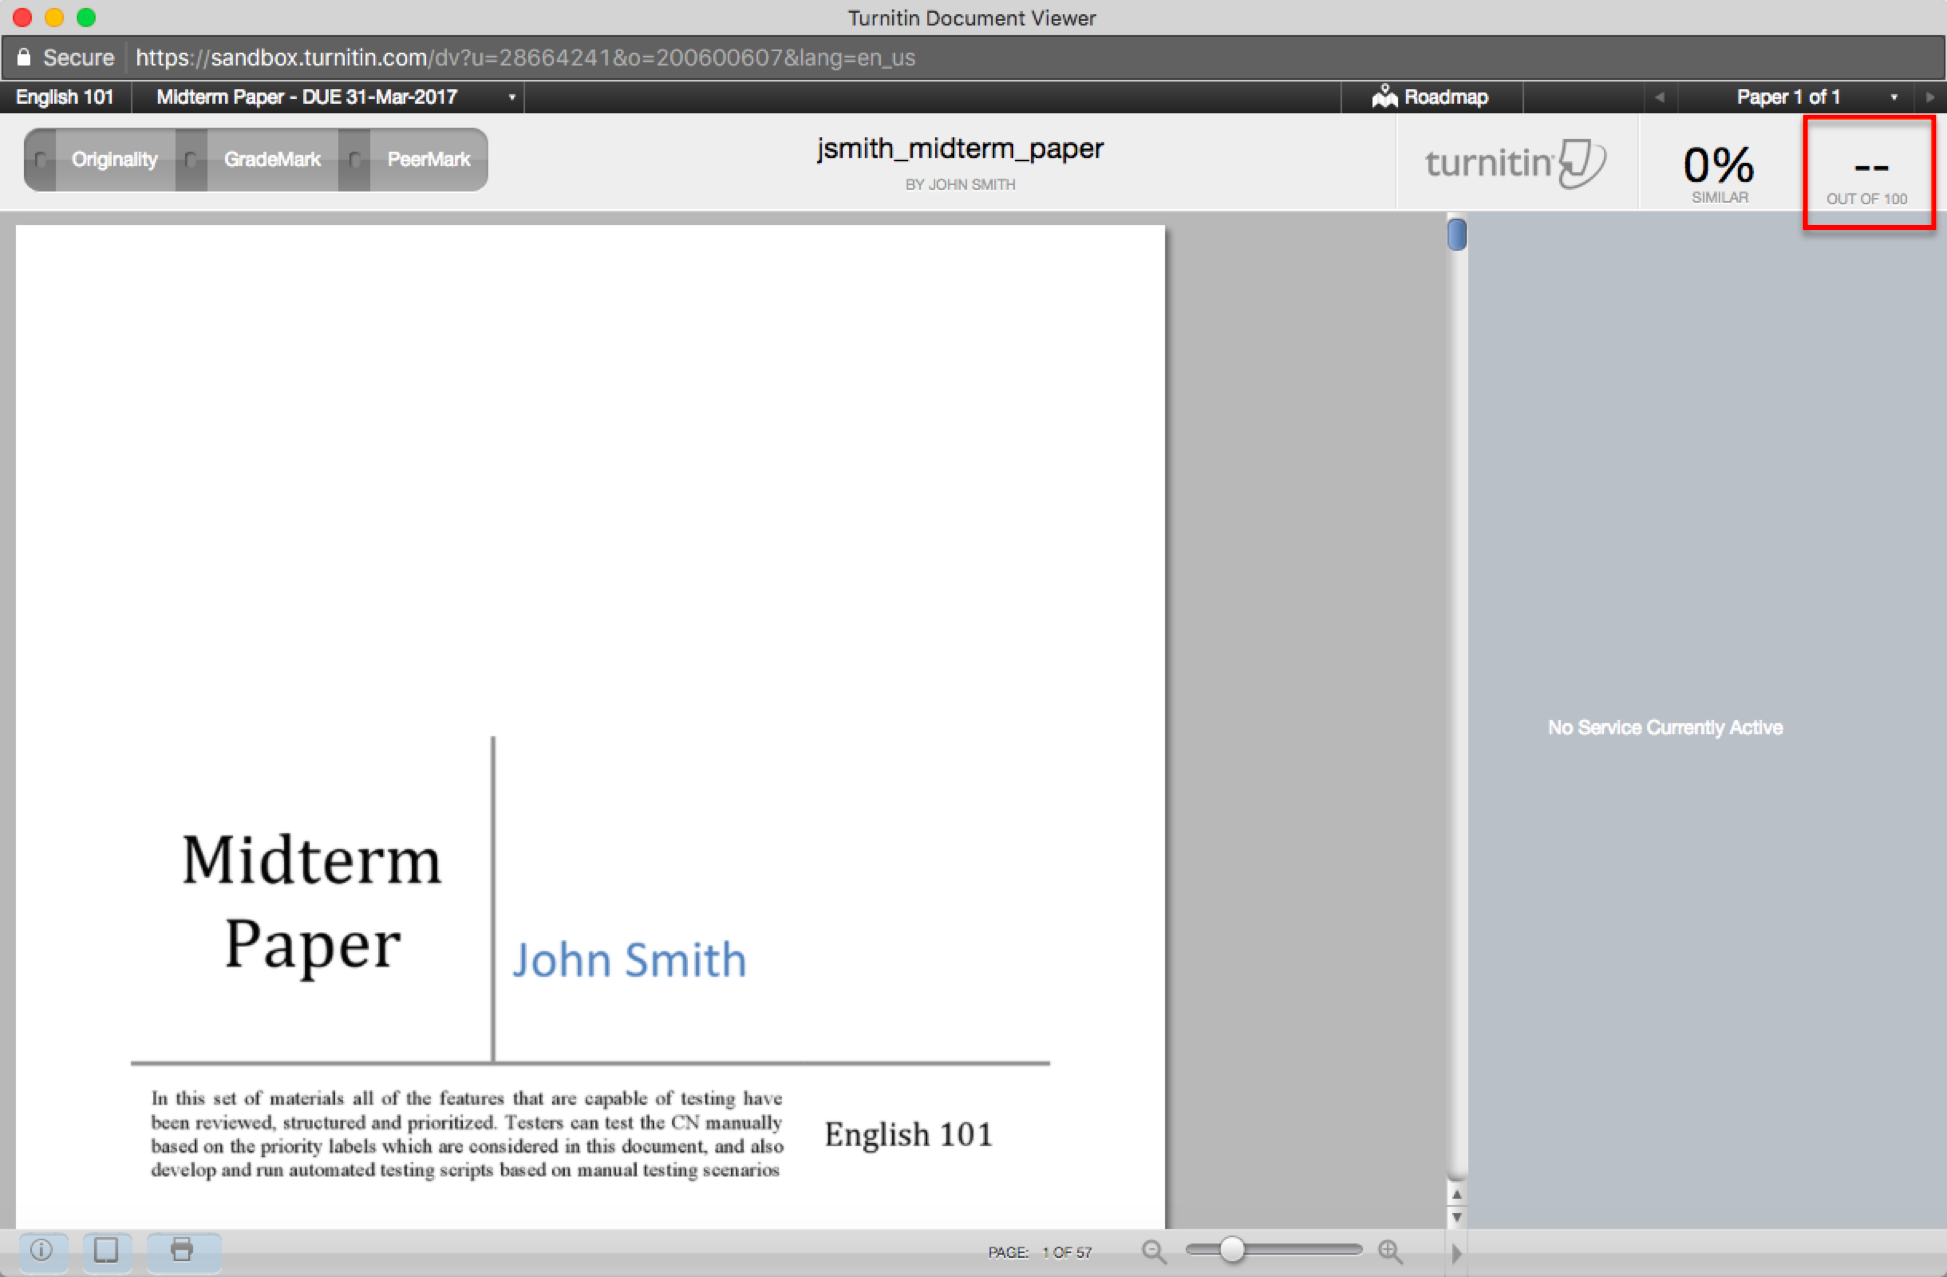
STEP 2: You should now see the Turnitin Document Viewer. In this window, you can view the originality report, provide feedback on different parts of the paper with the Comment button, and grade the assignment. To grade the assignment, click on the double dashes in the top right corner. Type in the grade you want to give the student and then click the enter/return key. Once you are finished, you can close down the window. All activity is saved automatically.
The assignment has been successfully graded! The grade will be automatically recorded in CN DropBox and GradeBook.
Student: View Turnitin Submissions
After the instructor finishes grading and releases feedback, students can check their grades and similarity reports in DropBox by selecting the Turnitin assignment from the Item Name dropdown (for Classic courses) or directly on the specific assignment activity (in Pathway courses).
CN now supports Turnitin LTI 1.3, a newer integration version for enhanced security and more assignment options. Check out this guide for details.
Comments
0 comments
Please sign in to leave a comment.